Portainer and Authentik / Traefik failling to login due to UFW

Status: CURRENT — ENVIRONMENT-SPECIFIC FIX
Last reviewed: 31 August 2026
Applies to: Portainer + Authentik OAuth/OIDC behind Traefik with UFW enabled

This was the fix for my setup. If disabling UFW immediately makes the Authentik login work, the firewall path is involved. Docker and UFW interact in slightly weird ways though, so don’t assume every Docker host will behave exactly the same.

I use Authentik with Traefik for SSO, and Portainer authenticates against Authentik using OAuth/OIDC.

Authentik still has a Portainer integration guide, although that page still notes it was originally based on Authentik 2021.7.3 and Portainer 2.6.x. Portainer’s current documentation still supports a Custom OAuth provider.

This post isn’t another full Portainer/Authenik setup guide. It’s for the stupid problem I hit after the OAuth configuration looked correct.

The problem

When I tried logging into Portainer through Authentik, the login failed. Inspecting the browser console showed a request returning 404, which eventually resulted in a 401 Unauthorized.
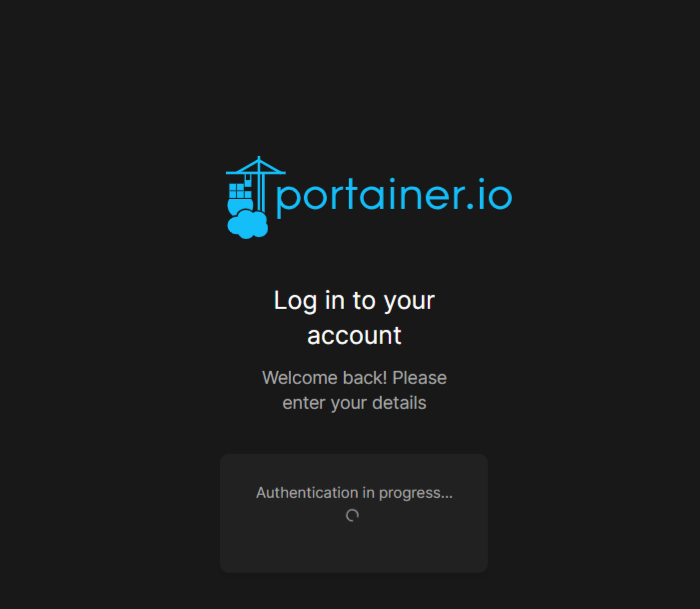
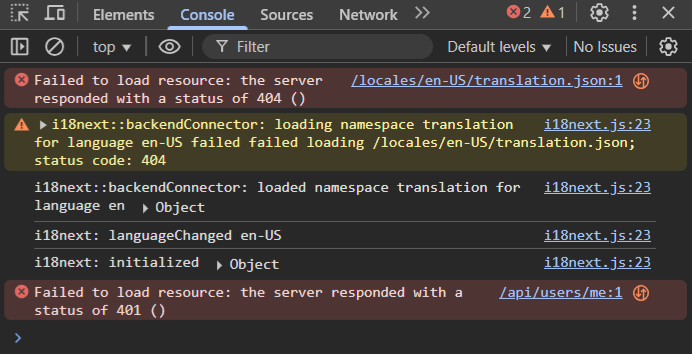
Portainer Authentik login failure
Browser console showing the authentication request error

Portainer, Authentik and Traefik were already on the expected Docker networks and changing the Traefik configuration wasn’t getting me anywhere.

The thing that finally exposed the problem was testing with UFW disabled.

Check UFW first

Before changing anything, check the current firewall state:

sudo ufw status verbose


If Traefik is supposed to be reachable over HTTPS but there is no rule allowing the traffic you expect, that is worth investigating before ripping apart your Authentik configuration.

Temporarily disable UFW as a test

Diagnostic test only: disabling the firewall removes protection from the host while it is off. Don’t leave UFW disabled as the fix.

Temporarily disable UFW:

sudo ufw disable


Now try the Portainer → Authentik login again.

In my case it immediately worked. That told me the OAuth configuration itself wasn’t the problem — traffic involved in the HTTPS authentication flow was being blocked by my firewall setup.

Why being on the same Docker network didn’t save it

This caught me out because Portainer, Authentik and Traefik were on Docker networks together.

OAuth/OIDC isn’t necessarily just container-to-container traffic. Your browser is redirected between the Portainer and Authentik HTTPS URLs, and the callback returns through those hostnames. If the HTTPS path to Traefik is broken, the authentication flow can fail even though the containers themselves can communicate internally.

Docker + UFW warning: Docker’s normal published ports are implemented with Docker-managed firewall/NAT rules, and Docker documents that published container ports can bypass the normal UFW INPUT/OUTPUT rules.

Because of that, ufw allow 443 is not universally required for every Docker-published Traefik instance. If toggling UFW changes the result on your host, inspect how Traefik exposes 80/443 and any custom forwarding/firewall rules rather than assuming this exact fix applies everywhere.

Check how Traefik is listening

A quick check on the Docker host:

sudo ss -lntp | grep -E ':(80|443)\b'


You can also check Docker’s published ports:

docker ps --format 'table {{.Names}}\t{{.Ports}}'


This helps work out whether Traefik is listening directly on the host, using Docker port publishing, host networking, or something more customised.

The fix on my host

Once I confirmed UFW was involved, I re-enabled it and allowed HTTP/HTTPS for Traefik.

If you’re connected to the server remotely over SSH, make sure SSH is already allowed before enabling UFW or you can lock yourself out.

sudo ufw allow OpenSSH
sudo ufw allow 80/tcp comment 'Allow HTTP for Traefik'
sudo ufw allow 443/tcp comment 'Allow HTTPS for Traefik'
sudo ufw enable
sudo ufw reload


Then confirm the rules:

sudo ufw status numbered


After that, the Portainer login through Authentik worked normally again.

Do you actually need port 80?

Not necessarily. If your Traefik setup only needs HTTPS and you aren’t using port 80 for an HTTP → HTTPS redirect or an ACME HTTP challenge, then you may only need:

sudo ufw allow 443/tcp comment 'Allow HTTPS for Traefik'


Open only what your setup actually needs.

If disabling UFW does NOT fix it

Then stop blaming UFW 😅 and go back through the OAuth flow.

  • Confirm the Portainer redirect URL exactly matches the redirect URI configured in Authentik.
  • Confirm Portainer’s Authorization, Access Token and Resource/UserInfo URLs point at the correct Authentik instance.
  • Check the Client ID and Client Secret.
  • Portainer’s OAuth scopes should be space-separated, not comma-separated.
  • Confirm both the Portainer and Authentik hostnames are reachable from the browser performing the login.
  • Check Traefik and Authentik logs while reproducing the login.

Portainer’s current documentation still supports Settings → Authentication → OAuth → Custom, so the general Authentik-as-OIDC-provider design remains valid.

Summary

For me, the giveaway was simple:

UFW enabled  → Authentik login fails
UFW disabled → Authentik login works


That narrowed the problem from “something is broken in Authentik/Portainer/Traefik” to “the firewall path is involved”, which was a hell of a lot easier to troubleshoot.

Just remember that Docker’s own firewall rules can bypass UFW for normally published container ports, so treat this as a troubleshooting method and my specific fix rather than a universal Docker rule.

References

Jellyfin and Authentik OIDC with admin

Status: CURRENT — COMMUNITY OIDC / PRE-STABLE PLUGIN
Last reviewed: 31 August 2026
Applies to: Jellyfin + Authentik using the community SSO/OIDC plugin

Important: Authentik’s current official Jellyfin integration guide now recommends LDAP, not OIDC. This article is specifically for people who still want OIDC/SSO through the community Jellyfin SSO plugin.

⚠️ Keep a break-glass Jellyfin admin account. A bad role mapping can remove administrator permissions from the account you normally use. Before changing SSO/admin-role settings, create or keep a second local Jellyfin administrator that does not depend on OIDC.

A quick 2026 update

When I originally wrote this article, the common OIDC option was the 9p4/jellyfin-plugin-sso plugin. That repository was archived by its author on 12 May 2026.

There is now a community revival maintained under Flowfin/jellyfin-plugin-sso. It supports Authentik over OpenID Connect and retains role-based mappings including administrator roles. It also keeps the same plugin GUID as the original 9p4 plugin, so it is designed to install over an existing installation while keeping the configuration.

At the time of this review the Flowfin project is still pre-stable/release-candidate software, so read its current installation notes before using it on a production Jellyfin server.

If you just want the Authentik-supported path with fewer moving parts, the current Authentik Jellyfin guide uses Jellyfin’s LDAP Authentication plugin instead.

The admin-role problem

With the OIDC SSO plugin, Jellyfin can use a role/group claim from Authentik to decide whether an SSO user should have Jellyfin administrator permissions.

The important settings are:

  • Role Claim: usually groups when using Authentik’s group claim.
  • Admin Roles: the exact Authentik group name that should grant Jellyfin administrator access.

For example, I originally used Authentik’s default administrator group:

authentik Admins


You can also create a dedicated group specifically for Jellyfin administrators, which is cleaner than tying Jellyfin permissions to Authentik’s own superuser/admin group.

In Authentik go to:

Admin Interface → Directory → Groups → Create


Create something like:

jellyfin-admins


Add only the users who should have Jellyfin administrator access to that group, then configure the Jellyfin SSO plugin with:

Role Claim: groups
Admin Roles: jellyfin-admins


The group name needs to match the value Authentik actually sends in the groups claim.

Jellyfin SSO plugin Admin Roles and Role Claim configuration

I also resized this screenshot from the original article because WordPress was rendering the full-size image way too large and making it look stretched.

Why admin access can disappear

The SSO plugin uses the role/group information supplied by the identity provider to determine administrator status. If your configured Admin Roles do not match anything in the incoming role claim, the SSO login may no longer receive Jellyfin administrator permissions.

This is why I strongly recommend keeping a separate local admin account while testing SSO. Don’t make your only Jellyfin administrator depend on an external identity provider and a role mapping you’re still configuring.

Fixing an existing locked-out admin

Credit to Spyros from the comments for this recovery method.

If you’ve already configured OIDC and your normal Jellyfin account has lost administrator access, the plugin configuration can be edited directly.

On my Docker setup the configuration was under:

/jellyfin/data/plugins/configurations/SSO-Auth.xml


Your actual host path may differ depending on where the Jellyfin /config volume is mounted. The important part is the Jellyfin plugin configuration file:

plugins/configurations/SSO-Auth.xml


Find the <AdminRoles> section and make sure it contains the exact Authentik group that should grant administrator access.

<AdminRoles>
  <string>authentik Admins</string>
</AdminRoles>


Or, if you’ve created a dedicated Jellyfin administrator group:

<AdminRoles>
  <string>jellyfin-admins</string>
</AdminRoles>


Save the file and restart Jellyfin.

After logging in again through Authentik, the account should regain Jellyfin administrator rights as long as the configured group is present in the incoming role claim.

If it still doesn’t work

Don’t just keep changing AdminRoles randomly. First confirm what Authentik is actually sending.

  • Confirm the Jellyfin plugin’s Role Claim is set to the claim containing your groups — commonly groups with Authentik.
  • Confirm the exact Authentik group name matches the value entered in Admin Roles, including spaces and capitalisation.
  • Confirm the user is actually a member of that Authentik group.
  • Check the Jellyfin logs during an SSO login for role/claim errors.
  • Keep your local break-glass admin available until the SSO mapping has been tested successfully.

Official LDAP vs community OIDC

As of August 2026 there are effectively two Authentik/Jellyfin paths:

  • LDAP: the method currently documented by Authentik. It uses Authentik’s LDAP provider/outpost plus Jellyfin’s LDAP Authentication plugin.
  • OIDC: the community SSO-plugin method covered by this article. The old 9p4 project is archived; the Flowfin revival is the current continuation but is not yet a stable release.

I still prefer OIDC conceptually for browser SSO, so I’m keeping this article rather than archiving it completely. Just be aware that it is now a community-plugin path, not Authentik’s current official Jellyfin integration.

References

And seriously — keep that second local admin until you’ve proved the OIDC role mapping works. Saving five minutes during setup isn’t worth locking yourself out of your own Jellyfin server 😅

Authentik and Home Assistant with working Companion App solution using Traefik proxy

Status: CURRENT — MAJOR 2026 UPDATE
Last reviewed: 31 August 2026
Applies to: Home Assistant, Authentik and Traefik with the Home Assistant Companion App

The original two-hostname workaround in this article still explains a real problem, but the component it relied on has now been archived. In 2026 I recommend authenticating Home Assistant directly with Authentik over OIDC instead of putting Authentik Forward Auth in front of Home Assistant.

I absolutely love logging into Authentik once and getting SSO across the homelab. Home Assistant used to be one of the awkward exceptions.

The original version of this article solved that by creating two Traefik routes:

  • A browser hostname protected by Authentik Forward Auth, using hass-auth-header to log the user into Home Assistant.
  • A second hostname that bypassed Authentik and showed Home Assistant’s normal login page so the Companion App could authenticate.

That workaround worked, and judging by the traffic/comments it helped quite a few people. But the Home Assistant authentication landscape has changed enough that I wouldn’t build a fresh setup that way now.

What changed?

The BeryJu/hass-auth-header component used by the original guide was archived on 23 October 2025. Its maintainer specifically points users toward newer Home Assistant OIDC integrations instead.

A maintained community project called OpenID Connect for Home Assistant now lets Home Assistant itself authenticate against Authentik using standard OIDC.

That means Authentik no longer needs to sit in front of Home Assistant as a Forward Auth middleware. Traefik just proxies Home Assistant normally, and Home Assistant performs the Authentik login itself.

Why this is better for the Companion App: the maintained OIDC integration is designed to handle Home Assistant login in both the web interface and Companion App. Its maintainer specifically advises removing reverse-proxy-level authentication when migrating from header-auth setups, because an extra authentication layer in front of Home Assistant can interfere with the app’s login flow.

Recommended 2026 setup

The new layout is much simpler:

Browser / Companion App
          ↓
https://home-assistant.richay.au
          ↓
       Traefik
          ↓
   Home Assistant
          ↓
 Authentik via OIDC


There is only one Home Assistant hostname, and there is no Authentik Forward Auth middleware in front of it.

1. Keep Traefik as a normal reverse proxy

Current Traefik does not need any special configuration for Home Assistant’s WebSocket traffic. A normal HTTPS router is enough.

Home Assistant changed its HTTP defaults in 2026.8:

  • Home Assistant OS: new default HTTP server port is 80.
  • Home Assistant Container: default remains 8123.
  • If you’ve manually configured another port, use whatever is shown under Settings → System → Network → HTTP server.

For a current Home Assistant OS install using port 80, my Traefik dynamic config would look roughly like this:

http:
  routers:
    home-assistant:
      entryPoints:
        - "https"
      rule: "Host(`home-assistant.richay.au`)"
      tls: {}
      service: home-assistant

  services:
    home-assistant:
      loadBalancer:
        servers:
          - url: "http://10.10.10.10:80" # Home Assistant OS 2026.8+ default


If you’re running Home Assistant Container, or your HAOS instance still uses the old/custom port, change the backend to:

url: "http://10.10.10.10:8123"


There is deliberately no Authentik middleware on this router. OIDC happens inside Home Assistant.

2. Configure Home Assistant to trust Traefik

Another 2026 change: from Home Assistant 2026.8, the HTTP server/reverse-proxy settings moved out of configuration.yaml and into the UI.

Go to:

Settings → System → Network → HTTP server


Enable Trust X-Forwarded-For and add Traefik under Trusted proxies.

If Traefik reaches Home Assistant from a Docker network such as 172.22.0.0/16, that is the network you would trust.

Don’t blindly trust your entire home LAN. The old version of this article included the whole 10.10.10.0/24 home network as a trusted proxy. Home Assistant’s setting is specifically for reverse proxies that are allowed to supply X-Forwarded-For. Trust only the Traefik IP/network that actually proxies the request.

If you’re still running a Home Assistant release before 2026.8, the equivalent old YAML was:

http:
  use_x_forwarded_for: true
  trusted_proxies:
    - 172.22.0.0/16 # Replace with your Traefik proxy network


3. Install the Home Assistant OIDC integration

Install OpenID Connect for Home Assistant through HACS.

After installing and restarting Home Assistant, go to:

Settings → Devices & Services → Add Integration → OpenID Connect/SSO Authentication


The integration includes an Authentik-specific setup flow.

4. Create the Authentik OIDC application

In Authentik, create an Application with an OAuth2/OpenID Connect Provider.

The current integration guide recommends a Strict redirect URI of:

https://home-assistant.richay.au/auth/oidc/callback


Select an Authentik signing key so the provider uses signed ID tokens. The current Authentik setup guide for this integration uses an RS256 signing key.

Make note of the:

  • Client ID
  • Client Secret, if you’re using a confidential client
  • Application/provider slug

The OIDC discovery URL will look like:

https://auth.example.com/application/o/home-assistant/.well-known/openid-configuration


Replace the Authentik hostname and provider slug with your own.

5. Configure Home Assistant

In the Home Assistant OIDC integration:

  1. Select Authentik.
  2. Enter the Authentik discovery URL.
  3. Enter the Client ID and Client Secret if required.
  4. Configure user/group/role mapping as needed.
  5. Test SSO before removing or disabling any local login method.

Keep a local break-glass Home Assistant admin. Don’t make an external identity provider your only way back into the system until you’ve tested browser and Companion App login properly.

6. Use the same URL in the Companion App

The Companion App can now use the same address as the browser:

https://home-assistant.richay.au


There should no longer be a need for a second home-companion.* hostname just to bypass Authentik, because Authentik is no longer authenticating at the reverse-proxy layer.

Keeping Home Assistant private with Tailscale

You don’t have to publish the Home Assistant hostname to the open internet.

Home Assistant’s own current remote-access documentation lists VPN access such as Tailscale as a secure option. If your phone stays connected to Tailscale, the Companion App can continue updating sensors and reaching Home Assistant through the VPN.

I use Split DNS for this type of setup so the nice *.richay.au names resolve to my internal reverse proxy only while I’m at home or connected to Tailscale.

My guide is here: Tailscale Split DNS by Domain for Secure Home Server Access.

Legacy method — the original two-hostname workaround

LEGACY / NOT RECOMMENDED FOR NEW INSTALLS

I’m keeping this section because this article was widely used and existing installations may still be running it. The method relies on the now-archived hass-auth-header custom component.

The original workaround looked like this:

Browser
  ↓
home-assistant.example.com
  ↓
Traefik + Authentik Forward Auth
  ↓
X-authentik-username
  ↓
hass-auth-header
  ↓
Home Assistant

Companion App
  ↓
home-companion.example.com
  ↓
Traefik WITHOUT Authentik
  ↓
Normal Home Assistant login


That architecture solved the Companion App problem because the app never had to pass through Authentik Forward Auth.

However, the second hostname is not magically secure. If home-companion.example.com is publicly reachable, anyone can reach Home Assistant’s normal login screen through it. Making the hostname obscure is not meaningful protection.

If you continue using this old method, make the Companion hostname private using LAN DNS, Tailscale Split DNS, a VPN, firewall rules, or another real access-control boundary.

Legacy hass-auth-header configuration

The custom component itself still expected something similar to:

auth_header:
  username_header: X-authentik-username


Reverse-proxy trust is separate. On current Home Assistant releases configure Traefik under Settings → System → Network → HTTP server rather than adding a new http: YAML block.

The archived hass-auth-header project itself warns that a bad configuration can allow unintended access to Home Assistant. If you keep using it, only trust headers arriving from your actual reverse proxy and plan a migration to OIDC.

Why Authentik Forward Auth can still break the Companion App

This part of the original article remains relevant.

Reverse proxying Home Assistant is fine. The problem is adding a separate authentication wall in front of Home Assistant.

The current Home Assistant OIDC integration’s maintainer explicitly describes reverse proxy + proxy-level authentication as an unsupported scenario for the Companion App. When the login flow leaves the Home Assistant domain for an extra proxy authentication step, the app can fail to complete its own authorization hand-off.

That’s why the modern solution is:

Traefik: reverse proxy only
Home Assistant: handles authentication
Authentik: OIDC identity provider


rather than:

Traefik: reverse proxy + authentication gate
Home Assistant: receives pre-authenticated headers


Troubleshooting

If the browser works but the Companion App does not:

  • Make sure you are not still applying an Authentik Forward Auth middleware to the Home Assistant router.
  • Make sure the app is using the same Home Assistant hostname configured in the Authentik redirect URI.
  • Confirm Home Assistant trusts Traefik as a reverse proxy.
  • Confirm the OIDC callback is exactly /auth/oidc/callback.
  • Test local Home Assistant login as a fallback before assuming the issue is OIDC.
  • Check Home Assistant logs and Authentik provider/outpost logs during the login attempt.

If Home Assistant returns 400 Bad Request behind Traefik, check the HTTP Server settings and confirm the Traefik IP/network is listed under Trusted proxies.

References

The old workaround did its job, but this is one of those rare cases where the newer method is actually simpler: one hostname, proper OIDC, no header-auth hack, and the Companion App doesn’t need its own secret back door 🙂